Build the Skyscraper Training Priority Tier List
Community-style order for carry vs speed investments that serve real tower finishes.
How to read this list
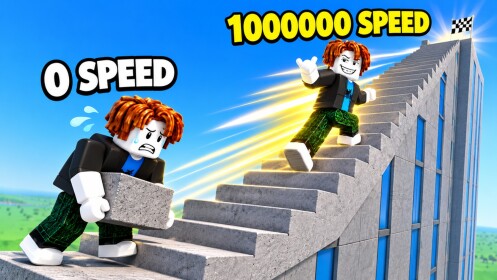
Build the Skyscraper! tells you to train so you can carry more and move faster. This page ranks those investments in S/A/B style for typical co-op sessions, including Lava Update routing pressure. It is community-style advice, not an official developer curve, and it refuses fake percentage tables.
Deep mechanics live on Training Stats. Pair results with Materials and Carry, How to Build, and Co-op Teamwork.
Ranking criteria
- Impact on floors completed per minute.
- Impact on finish rate with 2–8 teammates.
- Synergy with safe routes under lava-themed hazards.
- Time cost of the training block itself.
- Risk of over-investing past the real bottleneck.
S tier — buy these feelings first
Early carry to “useful stack” size
Your first carry breakthroughs that turn token loads into pad-feeding stacks. Stop calling it S once additional carry no longer changes trips-per-floor.
Early speed to “confident loop” pace
The speed levels that make depot→pad→depot feel intentional instead of sticky. Especially S when lava detours lengthen the walk.
Post-finish shared train waves
Not a stat, but an investment pattern: the whole squad trains briefly after a tower completes. S because it preserves pad staffing during pushes while still growing power.
A tier — strong follow-ups
Carry after a proven safe lane
Once Lava Update tips scouting says the path is stable, more carry multiplies every runner. A-tier until diminishing returns show in identical-route tests.
Speed when crowds or hazards spike
50-player lobbies and glow-edge maps punish slow acceleration. Raise speed when collisions or near-falls waste loads.
Rotating dedicated trainer role
One player trains while others build. A-tier coordination investment that beats silent mass gym breaks.
B tier — situational
Stacking one stat far ahead
All carry or all speed beyond comfort. Fine for experiments between towers; B during serious finish pushes.
Training mid-final floors
Only correct if wipes are guaranteed without a tiny speed bump. Otherwise B/C because the pad goes hungry.
Long AFK-style sessions without a retest
If you do not run the same loaded route afterward, you cannot know whether the upgrade mattered. Process quality keeps this from falling to C.
C tier — usually waste
Training to avoid learning the route
Stats do not fix a lost depot. Scout and read Getting Started instead.
Ignoring the pad for “max feel”
Endless gym while teammates beg for bulk.
Chasing rumor multipliers from invented codes
Use Codes only for verified rewards. This wiki will not invent training codes.
Default priority order (community)
- Minimum carry for useful stacks.
- Minimum speed for a confident loop.
- Reassess after one controlled build block.
- Add carry if trips-per-floor still high.
- Add speed if travel or lava lanes dominate time.
- Alternate in smaller bites; avoid single-stat tunnels.
- Prefer group train waves between skyscrapers.
Flip 1 and 2 if your lobby’s depot is extremely far or the themed path is long—the map decides, not dogma.
Diminishing returns without math cosplay
After each block, ask only: did identical trips finish floors faster? If yes, that tier investment still pays. If no, switch stats or fix materials/placement. When both stats feel “fine” but finishes stall, the problem is teamwork or pad discipline—not another gym level. Open How to Build.
Role-based priority tweaks
- Runners: Slight bias to speed once stacks are useful; surviving lanes delivers more than theoretical max weight.
- Placers: Least need for deep training mid-tower; take shared waves between finishes.
- Flex trainers: Follow the bottleneck the squad names aloud, then prove it with a haul.
See role habits in Co-op Teamwork.
Lava Update modifier
During heat branding, promote speed and scouting one notch whenever wipes rise, and demote raw carry until medium loads survive. Themed maps make “heavier” a liability if “alive” is not solved. Verify environmental changes on Updates: Lava Update rather than assuming permanent damage formulas.
Example session using the tiers
Join → scout → build with starter stats → hit S-tier early carry → build → hit S-tier early speed → A-tier rotating trainer while pad stays fed → finish push with no gym → shared S-tier train wave → next tower. That rhythm matches the official grow-stronger fantasy without abandoning the skyline.
Closing reminder
Tiers organize attention. Finished skyscrapers validate them. If your results disagree with this page, trust your timed routes and update your own order—then keep climbing.
Frequently Asked Questions
Quick answers for builders climbing the skyline.
Is carry always better than speed?
No. Take minimums in both. Lean carry when the pad needs volume; lean speed when distance or lava hazards dominate the trip.
When should we all train together?
Best between finished towers. Mid-push, prefer one rotating trainer so placement never stops.
How do I know I over-trained one stat?
Identical test trips stop improving floors per minute, or heavier loads start causing wipes. Switch stats or fix the route.
Where is the deeper training guide?
See Training Stats for upgrade order intuition, diminishing returns feel-tests, and session sync.